I’m taking a brief break from currently completing step 10 to write to you, now, about steps 2 – 4. During the next few days, however, I will return to my gardening duties, and, soon, I will be up to my knees in dahlia tubers. I won’t know exactly how many I have until I start digging, but, based on our bumper crop of dahlias this past summer, I’m exceptionally confident there are hundreds of those precious little rascals hiding under our loamy soil. Ah…but I am getting ahead of myself. Back to our 10-step plan and the next three steps:
- Order tubers and other supplies
- Prepare soil
- Plant and stake (if not done already)
2. Order Tubers and Other Supplies
Ordering tubers the first time can be stressful, but, if you have the right attitude, it also can be a lot of fun!
There are numerous companies/farms that sell dahlia tubers. You can look online or visit your local garden center.
For our first crop, I wanted to order a wide range of cultivars varying in color, type of bloom, and, of course, bloom size. Ultimately, I chose 23 hybrids in varying shades. Their colors? Garnet, apricot, coral, peach, tangerine, lemon, pineapple, pink, rose, blush, salmon, rosewood, magenta, plum, sand, biscotti, chiffon, pearl, and white. Bloom sizes? Ranged from small, or 2-3 inches, to dinner plate, or 6-8 inches.
And their names? ‘Melody of Dora’, ‘Arabian Nights’, ‘Prince of Orange’, ‘Thomas Edison’, Café au Lait’, ‘Kogana Fubuki’, ‘Otto’s Thrill’, and ‘Islander’ to name only a few.
I ordered 3 or 4 of every hybrid.
Farmers/gardeners are bound to suffer some loss every season and so I wanted to ensure that if I lost a plant, I had two or three back-ups of the same cultivar to provide me with blooms.
Next, I sat down and constructed a detailed schematic of our dahlia garden. It included the dimensions and locations of every plant. I suspected I’d have far fewer problems with the process of planting the dahlias if I had a clear idea of where each one would go. Additionally, I surmised that this same plan might minimize other potential problems as we progressed through the season and began harvesting the blooms.
Wow! Was I right!
As far as ordering supplies, though, Jim and I ordered 6-foot steel fence posts, twine, and a dump truck of exceptionally fertile, organic soil that was mixed with compost from a local landscaper. The dump truck of dirt was my 27th wedding anniversary gift. I love good dirt!
Our farm has excellent topsoil but for this project, we just did not want to take any risks. We were spending several hundred dollars on the tubers so we wanted our future “Kings of the Garden” to have the very best of everything from the very start.
3. Prepare Soil
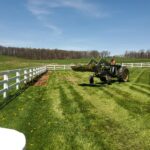
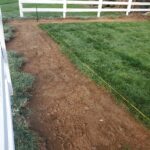
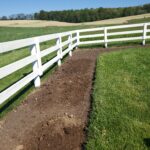
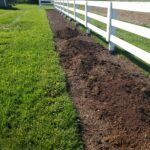
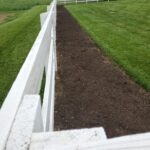
Jim removed about 3 inches of sod from our dahlia bed. Then, we loosened about an inch of the remaining soil in the bed; spread 3 to 4 inches of my anniversary present on top; and mixed it all together.
Finally, our dahlia garden was ready and all we needed to do next was wait until the soil temperature rose to 60°F and also until there was no longer any reasonable threat of frost.
4. Plant and Stake (or Stake and Plant)
Many people recommend planting and, then staking, but because of the way we chose to stake, we did the opposite.
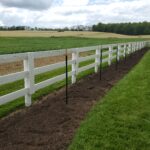
Jim and I planted all of the steel fence posts, 8 feet apart, prior to planting our dahlia tubers. Why did we do this?
Prior to staking and planting, I read a lot about various ways to do it. I did not choose the way I wanted to do it, however, until I watched a video on Youtube.com by Laura from @GardenAnswer, https://www.youtube.com/watch?v=nN77vPhvaK0. After watching this video, I chose to go with the metal fence posts planted 8 feet apart. And, I’m glad I did. Through this past summer’s winds and rains, the sturdy metal stakes helped to protect our dahlias from the inclement weather.
And? Jim and I chose to bury the posts prior to planting our tubers because we did not want to accidentally damage a tuber that was already underground if we started burying the fence posts after planting the tubers.
Well, with all of the fence posts finally in place, I, then, attached laminated labels with the dahlias’ names and locations to each post. When harvest time came, I wanted to be able to immediately refresh myself as to which dahlia was which when I was working in the garden.
Next, we ran plastic twine in two rows from fence post to fence post; the idea was that, as the dahlias grew taller, we could then fasten our plants to the twine. That part of the staking plan did not work as well, though, because we learned we had very different weather from Laura.
Dahlia stems are a little bit like large stalks of celery with hollow centers. If, as it rains, the soil becomes loose and the wind, simultaneously, begins to blow, that becomes a recipe for stem breakage. I know, because it happened to two of our plants after a violent thunder storm rolled through our farm. Miraculously, though, with the help of some heavy pruning, we were able to save both plants. That noted, I’d prefer, however, you not have to deal with all of that and, instead, learn from our mistake.
After our two dahlia plants suffered damage, certain we would eventually suffer more bad weather, I, then, sat down at my computer once again and started researching. Luckily, it didn’t take long before I found another Youtube.com video¾yes, I do like select youtube videos because you can learn a heck of a lot from other people¾of a cut flower farmer, “The Flower Guy”, who grows and sells dahlias wholesale.
In his video, https://www.youtube.com/watch?v=uKPhnkderDo, In spite of showing many gorgeous dahlias that he has grown, “The Flower Guy” humbly acknowledges and explains a few of the mistakes he has made in the past and what he has done to correct them.
I watched this particular video twice and took detailed notes.
One of his suggestions in this particular video is to plant two rows of fence posts in parallel. Then, in each row, run several lines of string /twine from fence post to fence post. The lines, parallel to the ground and 6 to 8 inches apart from each other, are to start at ground level and proceed upward to the tops of the fence posts. Doing this essentially creates two walls of line to protect the dahlias from rain/winds coming from two directions. As the dahlias mature and become bushier, the stability created by the crowding of the plants also helps protect them from rain and winds coming from the other two directions.
That seemed like a great idea to me, and? “The Flower Guy” proved that it worked.
This past summer, however, we did not have the time or the space in our dahlia garden to implement this improved plan and so I had to improvise. Taking what “The Flower Guy” said about protecting the dahlias from winds coming from two directions, I tied rows of twine on either side around and through my dahlias from post to post. Essentially, I crafted makeshift spider’s cocoons around them, allowing ample space, however, between the rows of twine for the stems to grow upward and outward. It worked so I was relieved.
Next year, though? I am going to put in the second row of fence posts.
Thank you to Laura and “The Flower Guy”, two experts in their field, for sharing their experience and wisdom with the public including me and especially for free.
Ok, back to the ten-step plan…
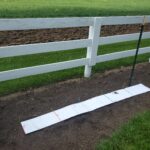
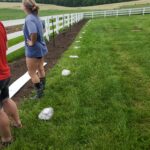
In May, the soil finally warmed up to that magical temperature of 60°F, and, since we were pretty certain by that time the threat of frost had subsided, our daughter, Mary-Kaitlyn, who came home from college to help us, our son, Mathew, Jim, and I gathered near the dahlia garden and, using a carboard template I had hastily made that morning marking the distances for the holes, swiftly planted our 90 dahlias, each tuber buried in holes dug 4 to 6 inches deep and spread 18 inches apart. And? Because an unforeseen storm began to brew just as we began marking the spots, we did it all very, very quickly.
As the rain began and we quickly gathered our tools, we glanced at the garden and smiled. Now, all we would have to do was patiently wait for our tubers to do their work and the dahlias to spring forth from the soil.


